A Dresser for our Daughter
Nesting#
When my wife said she wanted to move the old dresser into our yet-to-be-born son’s room, I asked if I could have “first right of refusal” on building a new dresser for our daughter. I asked because I knew it would take some time to complete, which isn’t necessarily ideal when you are trying to get everything ready for a new child. She said “of course”, and thankfully a friend had a spare dresser we could borrow in the meantime. So we were off and running!
Design#
I wanted to build something unique for our daughter that would work for her today but also be able to grow up with her. Something with a modern sensibility, a classic feel, and a bit of fun tossed in. She is a goofball after all!
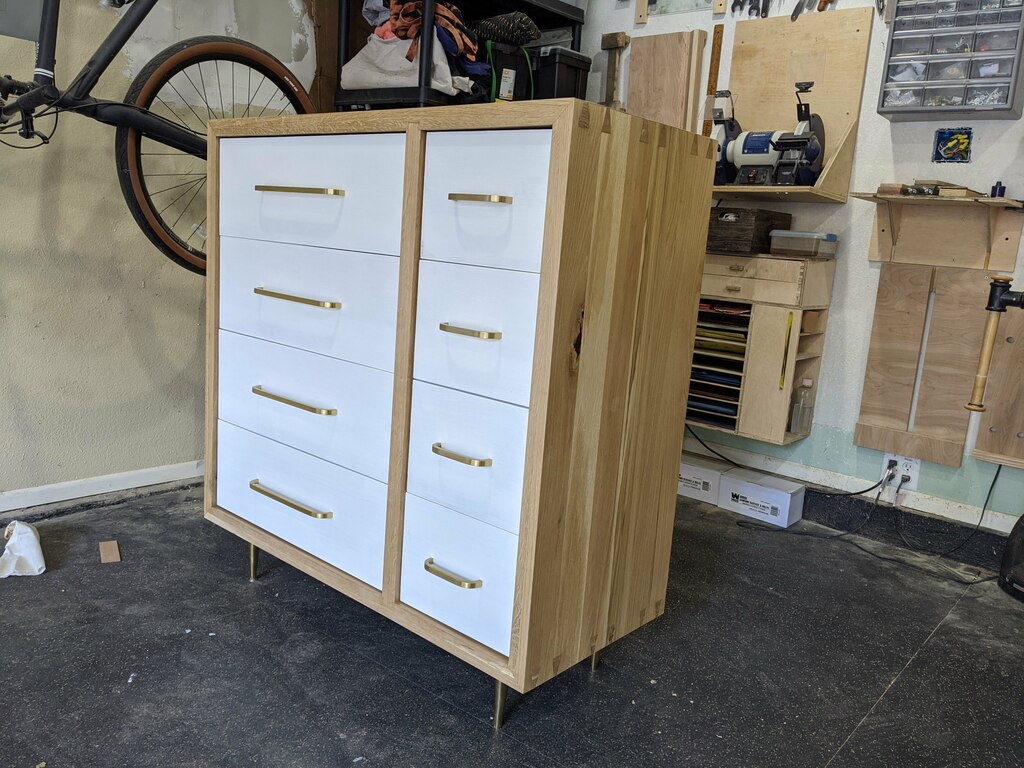
My wife and I discussed a few details and settled on a natural wood case with white-painted drawers, brass handles and wallpaper liners. But a lot still needed to be figured out. I tend to search through Google Images during the early stages of a project to think about inspiration. This time I perused a number of different forms - the tall dressers, the wide dressers and a few in between. I saw dressers whose drawer fronts obscured the entire frame and dressers with drawers of different shapes and sizes. Nothing quite spoke to me - everything seemed somewhat familiar. Finally, I stumbled upon a form factor I hadn’t seen before - it was essentially two dressers in one, with a stack of four wide drawers next to four narrower drawers of the same height. It had a playful, unexpected attitude, and I liked the fact that our daughter would be able to stow her socks in a small drawer right next to her pants in a larger one. Ironically I can’t find the photo anymore, but credit goes out to whoever designed that one for my initial inspiration.
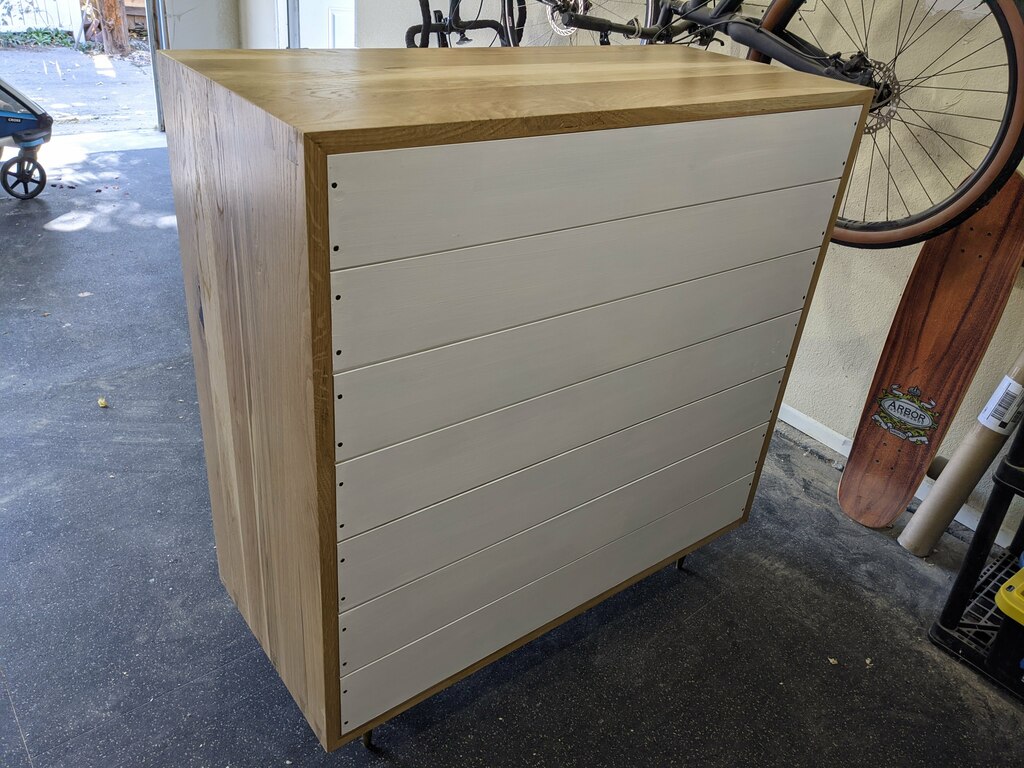
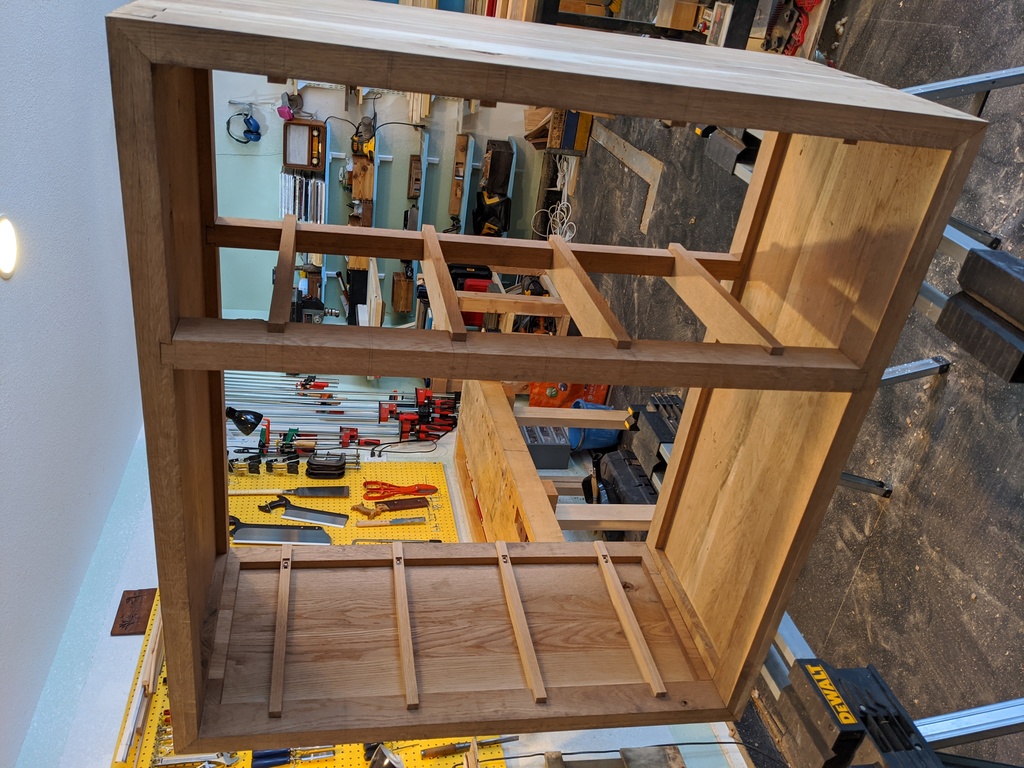
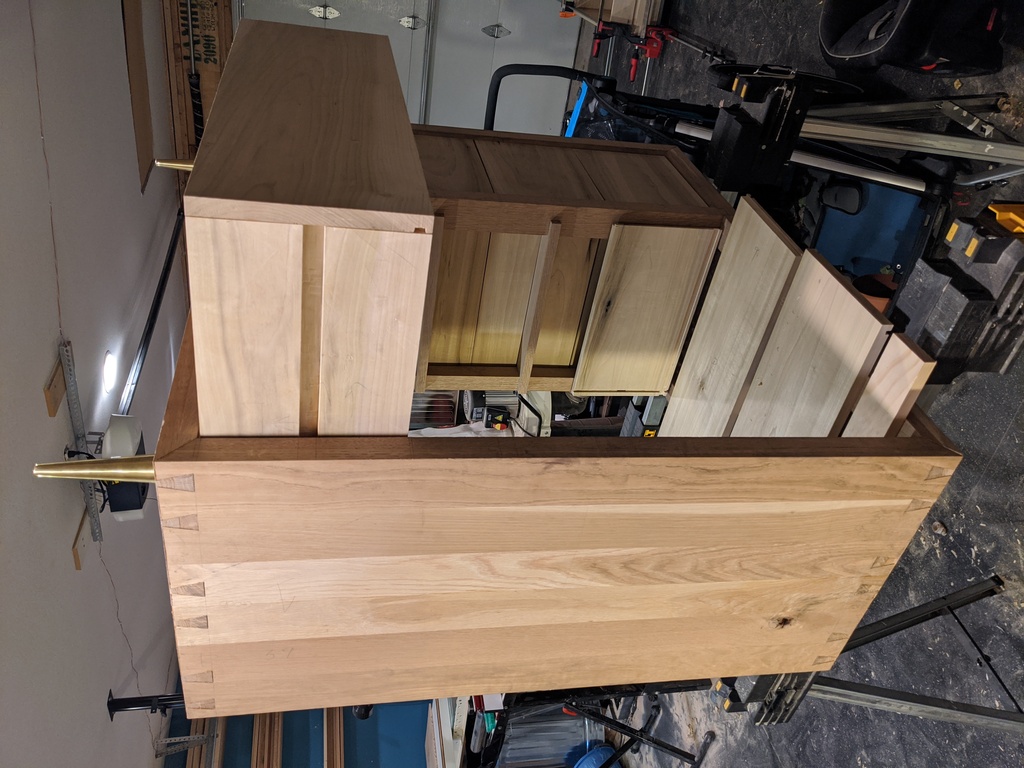
I played around with a few different sketches before settling on the size and shape I wanted. I’d made a case before with side-hung drawers, and I love how this allows the drawers to be just a bit bigger in the same amount of space. Since the case wouldn’t have any internal supports, I decided to make the outside frame out of 1 1/2” thick pieces of wood. But I didn’t want the entire case to be this thick, so I figured I’d make a 3/4” panel and reinforce the inside edges. I’d make a center column out of the same wood, and the whole thing would sit on brass legs (I thought about making a fancy wooden base, but figured I’d be out of time and energy at that point).
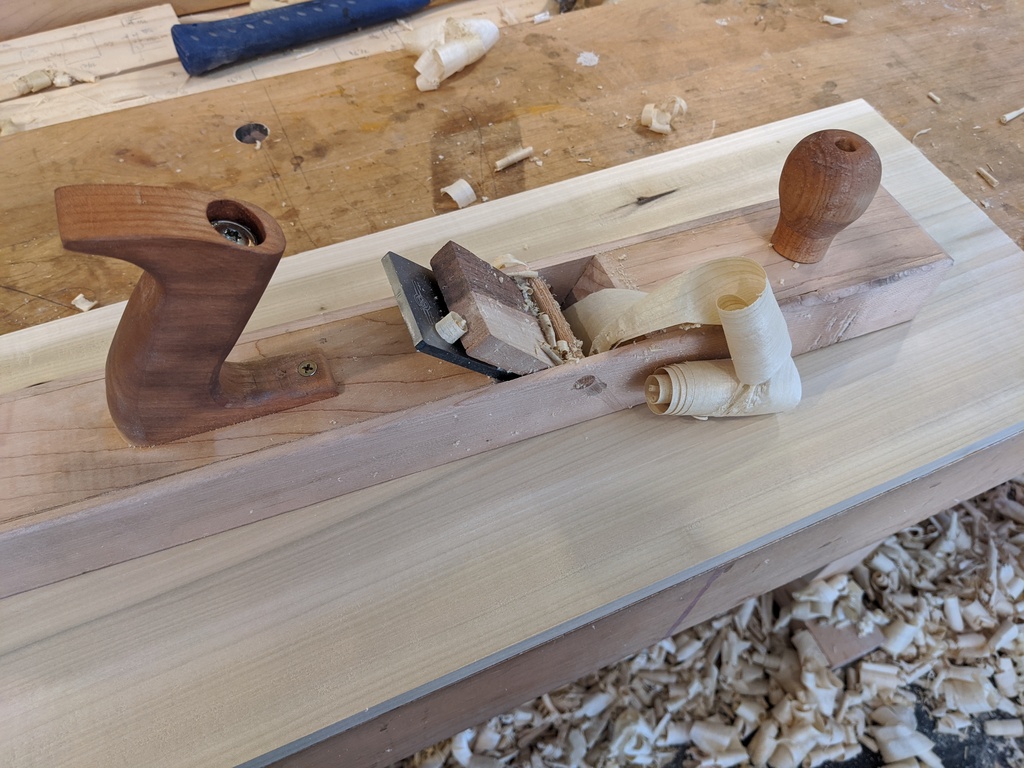
Oh, and I decided to make as much of it as I could using just hand tools, because I have more fun with that!
Joinery#
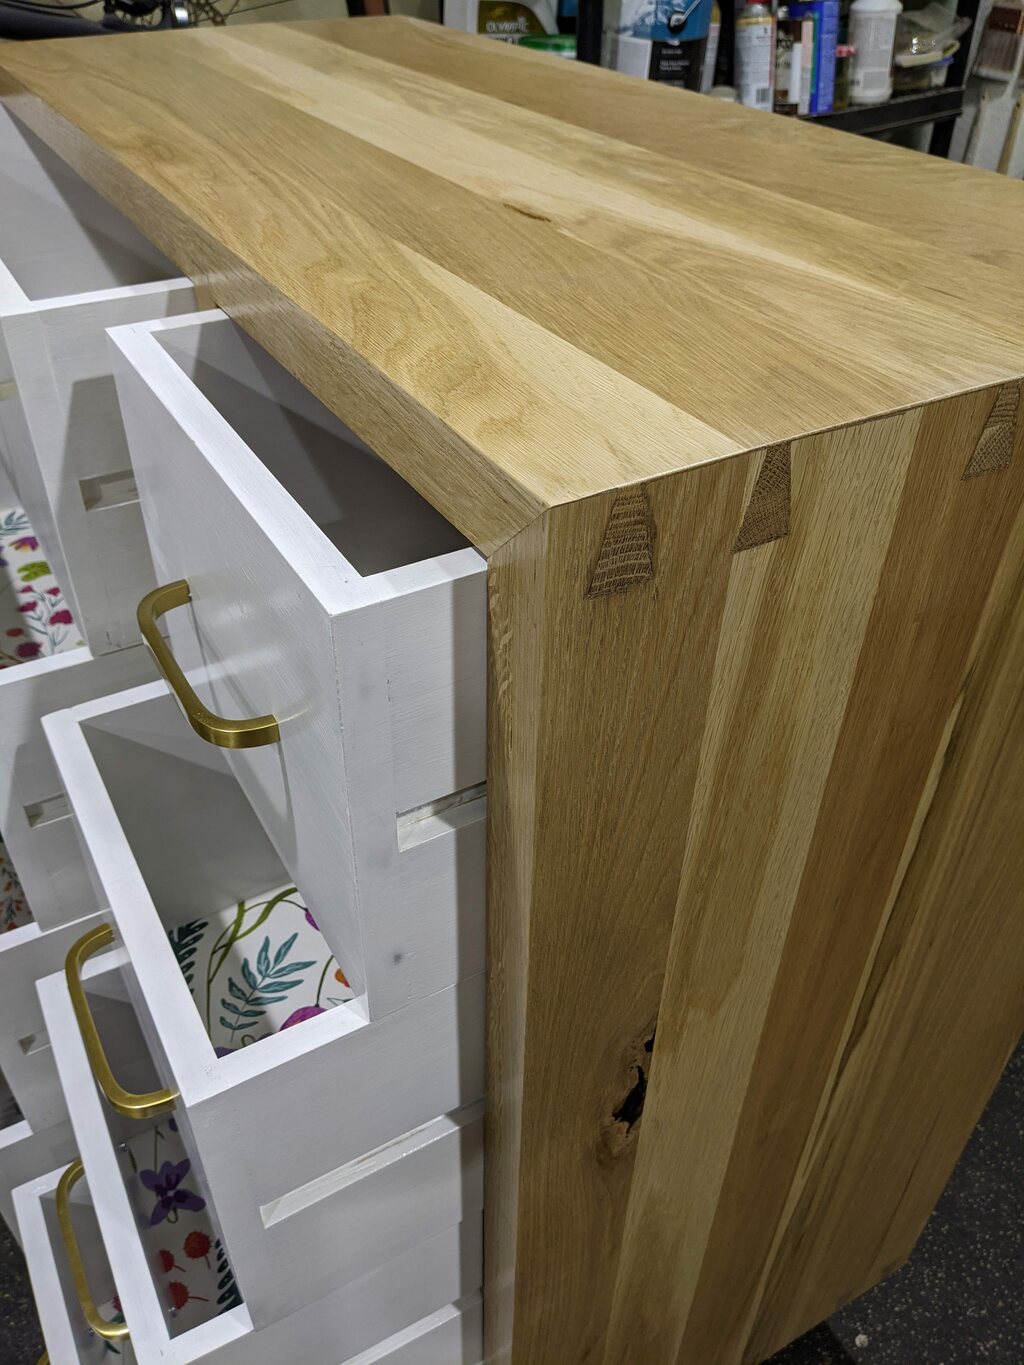
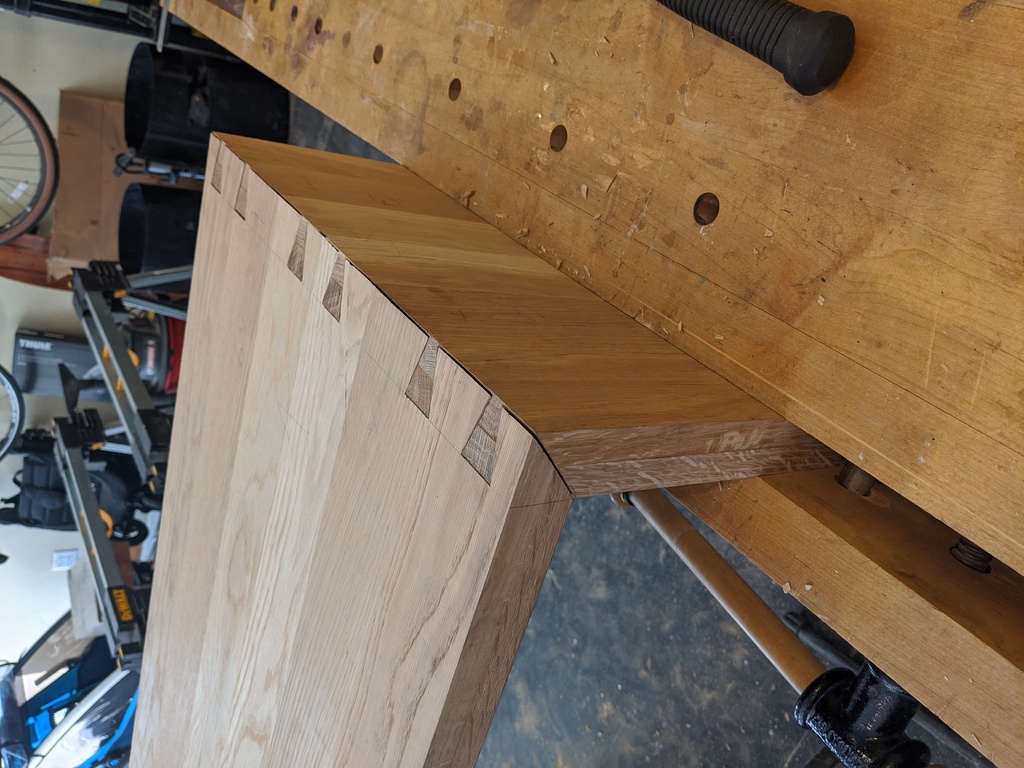
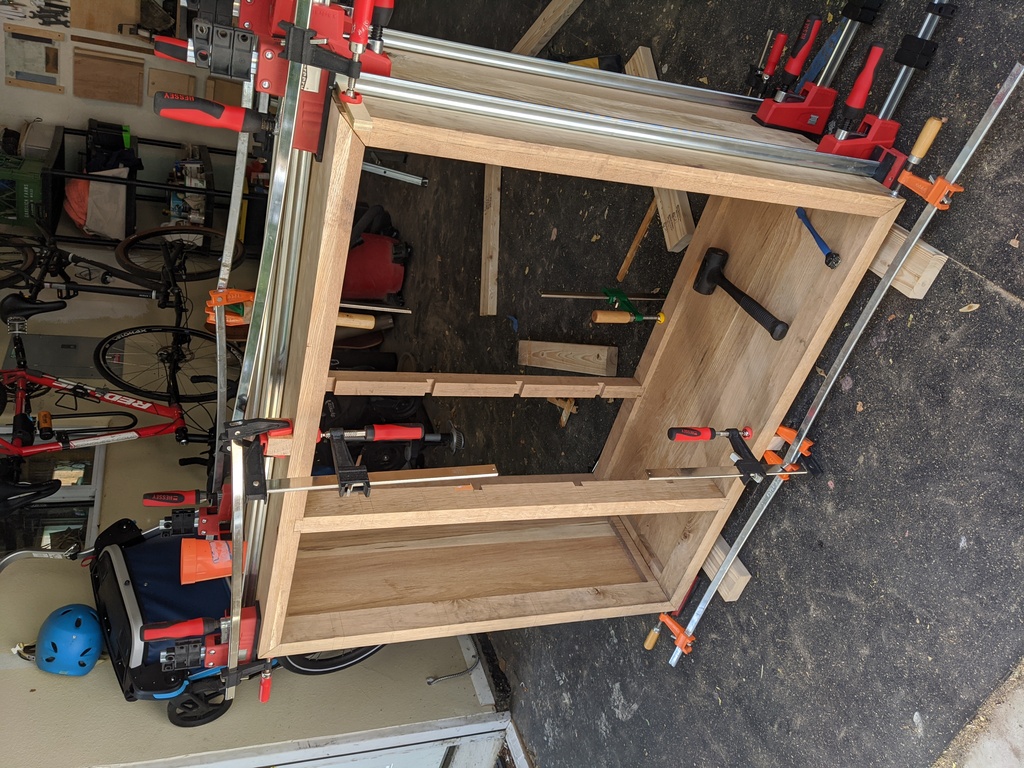
I picked up some white oak for the case and poplar for the drawers and got to work. The first thing I wanted to figure out was the main joinery I would use to put it all together. I figured that with a project like this I should push myself to try a few new techniques. The edges of the case would be 1 1/2” thick. Half-mitered dovetails (a dovetail joint that mates at a 45 degree angle) would be tricky, but they’d add some really interesting character to the case. A sliding dovetail joint in the center column would look cool and allow it to move independently.
I watched a few YouTube videos about these two joints, and found the instructions from the Renaissance Wooodworker to be particularly helpful. Long, but informative (and kinda funny too).
Having assembled the sides of the case, I cut out the tails of the dovetails, transferred them over to the other sides and cut out the pins. The next step was the tricky one - cutting the tails down to a perfect 45-degree angle, and then cutting the wood between the pins to the same. Apparently the trick was to make a perfect 45-degree angle on a board and then use this as a cutting guide for a chisel. PERFECT ended up being the operative word here - my first attempt wasn’t quite right, and I found that the angles were just a bit too steep on a few of the tails. I cringed a bit to see the gaps in my first joint, but after a lot of fiddling I managed to make it a bit better.
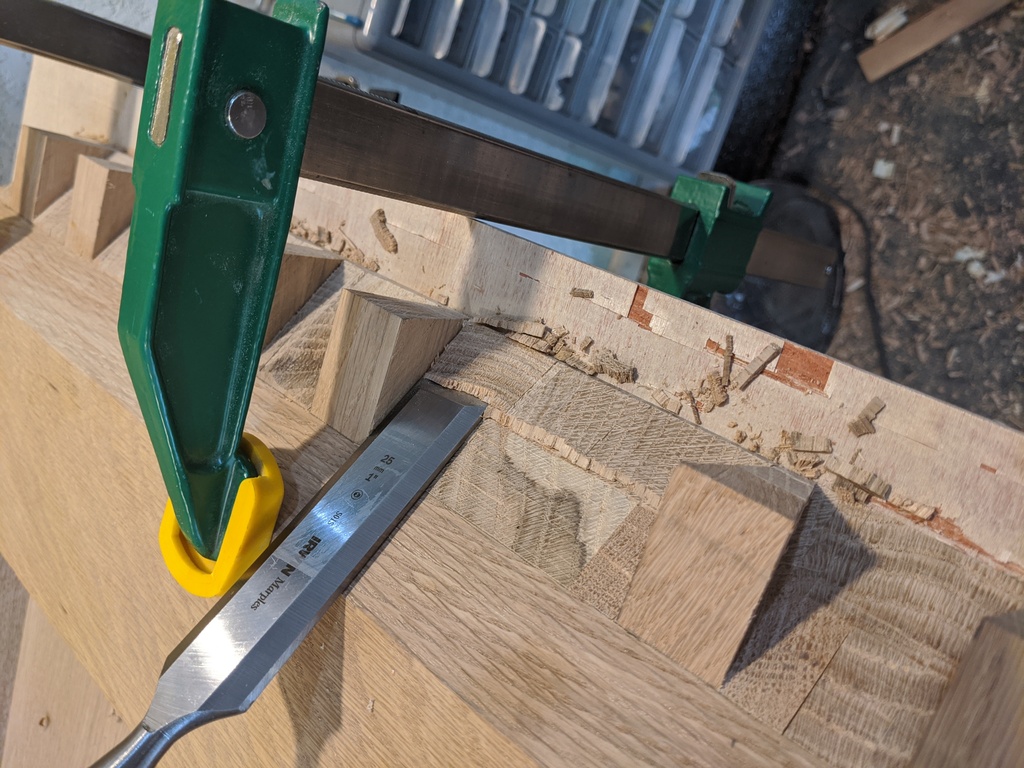
Followup attempts were still not perfect, but I had much better results on the next three after making a more accurate guide. And it felt pretty satisfying to clamp one giant panel to my bench, tap another panel into place, and see the joint hold the whole thing parallel to the ground.
The sliding dovetails on the center column(s) were a bit easier. This time I made a guide with a 12-degree slope (standard for a dovetail). I set a saw against this to cut out the sides of the joints on the case, and a router plane to clean them up. On the columns, the guide acted as a rest for the chisel, which pared the pins down to the same angle.
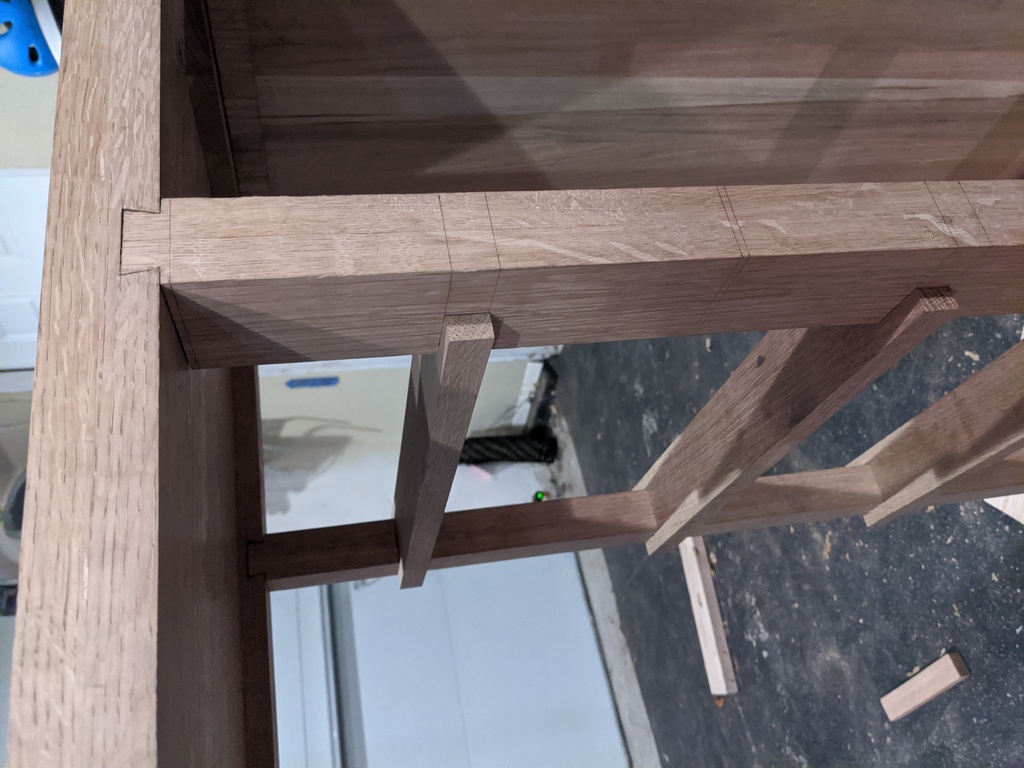
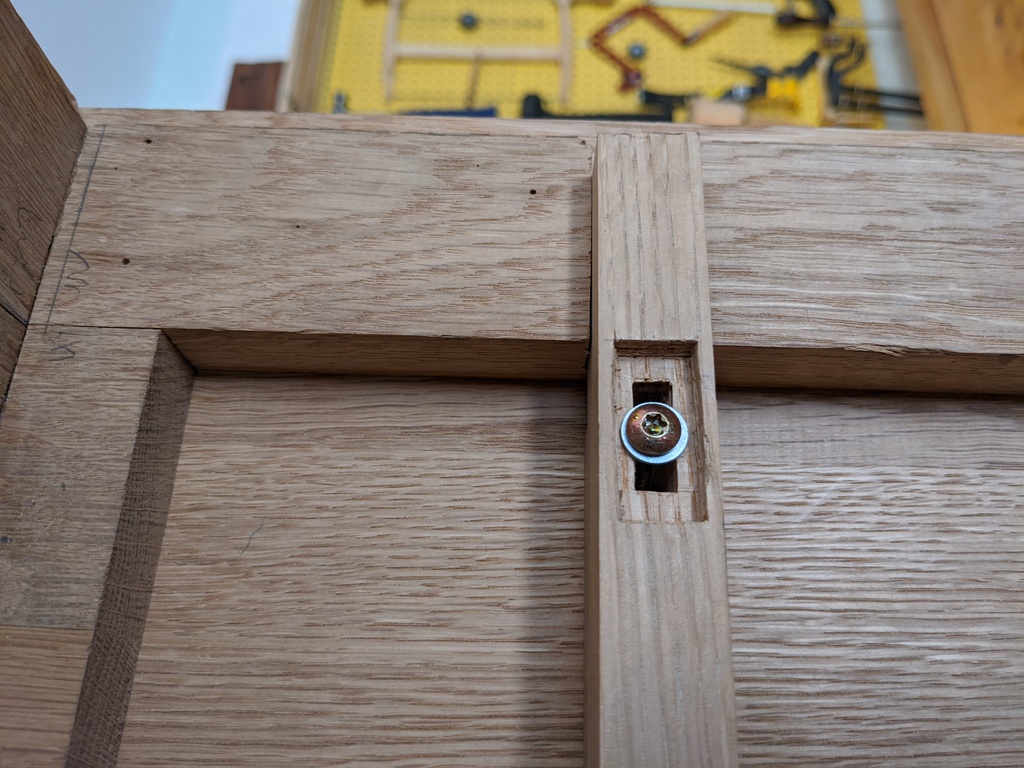
The last bit of trickery was on the rails that the drawers would slide on. The grain on these would run perpendicular to the case, which meant they needed to be able to move independently. I decided to glue the fronts to the case, and chisel out a slot that would allow them to slide back in forth a bit while behind held in place by a screw.
Gluing it up#
I always find glue-ups stressful, and this one was particularly. I think next time I’ll ask for a friend to help with anything this large. Fortunately I had purchased a few extra-large clamps ahead of time, and had chosen a glue with a longer curing time than my standard. I needed every minute of it, but by the time I stepped back everything looked clean.
Drawers#
If you’ve read this far and are feeling like skipping to the end to see photos of the finished product, believe me, so was I. (And, so was my wife.) The drawers were simpler, but there were eight of them, and the first one took me a discouraging four days to make. Granted, this was four days of sneaking in the work during my daughter’s nap time. By this point I was on paternity leave, and my standard day involved a lot of biking and running around with her in the morning while the new baby hung out with his mommy, followed by some time in the shop while our daughter napped. At this pace, the end of the project seemed fairly far off. Plus, I hadn’t planed down the sides as flat as I should have, so the box was just slightly askew. It was good enough though, and I’d learned enough about the design to crank the rest of the drawers out on an assembly line, doing a number of similar actions at once.
Planing the sides of the drawers to thickness was the slowest work, but the hardest was cutting the grooves that the drawers would slide along. I used a square guide to cut each side to depth and a chisel to remove most of the waste. A router plane helped me take it down to the final depth. Usually this is pretty smooth work, but something about the depth and length I was working with made the blade chatter. Despite my best attempts to sharpen the blade and work with the grain, I couldn’t help but leave plenty of gouges in the final product. The overall face was smooth enough to slide along the rails without much resistance though. It would have to be good enough!
Finishing#
I plugged a few knot holes in the case with epoxy then used a water-based polyurethane to give it a nice, glossy finish. Finally, it was starting to look like something! The drawers received three coats of white paint and three more of the poly, with plenty of sanding in between. I tried my best to keep the garage free of dust during the finishing but to no avail - each time we opened the door to take the stroller out for a walk dust blew in, and I was constantly picking small bits of leaves and other debris up off of the drawers. With so many to finish I couldn’t easily isolate the work to a back corner of the shop, so I decided to just get along with it.
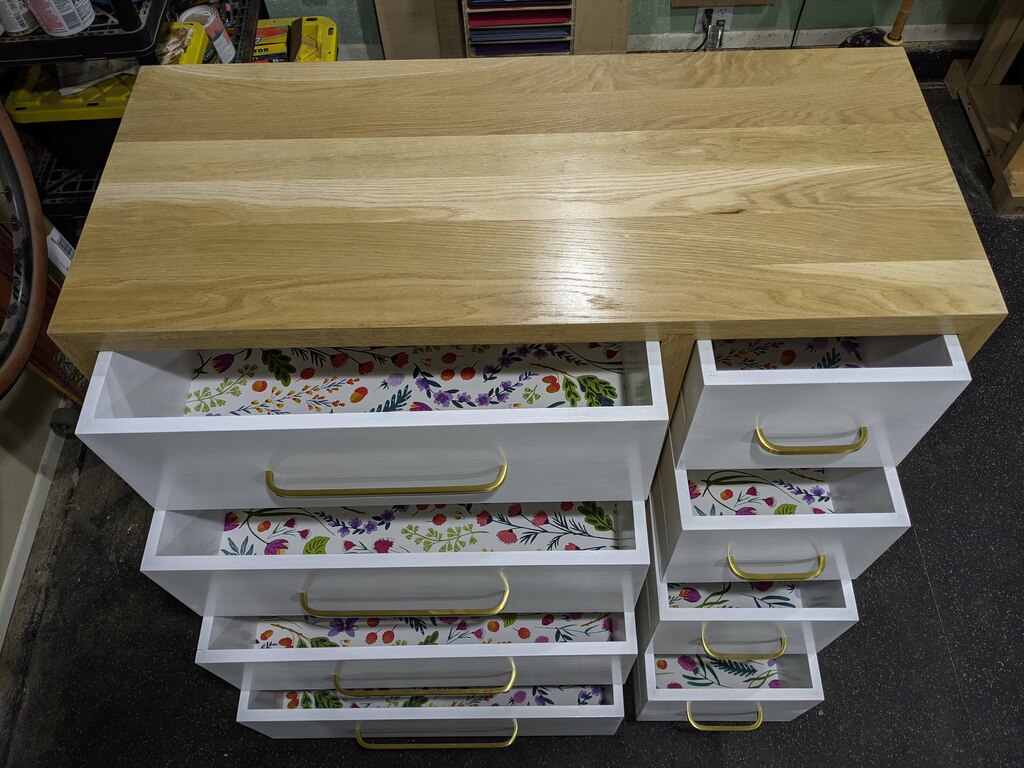
The final product still managed to look pretty nice, and with a bottom liner of wallpaper and the brash hardware attached they really started to pop. We even added some brass thumb screws to the back that would prevent the drawers from popping out when pulled too far.
The Final Product#
Something like 160 hours of time in the shop later, the dresser was done! The drawers took a bit of finesse to get perfect, but they all slide comfortably now. Our daughter has her socks in the bottom-right drawer and her pants in the bottom-left, just like I imagined. It’s by far the most complex piece I’ve built to date, and it was a lot of fun putting it all together. Now, on to the next (and hopefully simpler) project!